How To Create SSAS Cube From Scratch
Introduction:
Building SSAS Cube for the first time can be hard which is why I ensured that I write a blog that provides a step-by-step walkthrough to you so that you can create one for yourself and start experimenting on it.
SQL Server Analysis Services is an online analytical processing and data mining tool provided by Microsoft in Microsoft SQL Server.
PREREQUISITES:
- Visual Studio 2019
- SQL Server 2019
- AdventureWorksDW database 2019
- SQL Server Management Studio (SSMS) 18.11.1
Now when you have installed all these softwares, we can proceed to set up Visual Studio Data Tools in Visual Studio 2019.
Step 1: Create a new Visual Studio Project
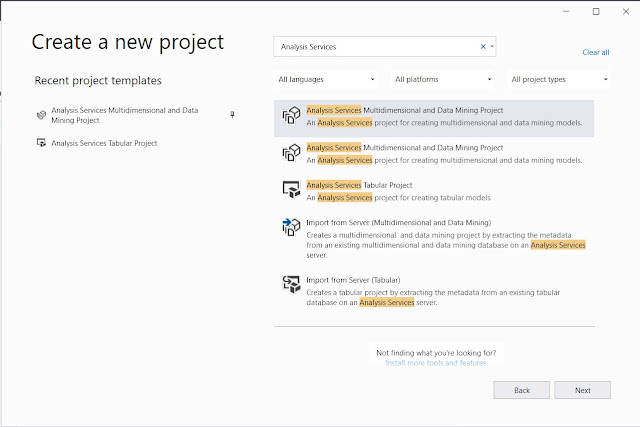
Click the "Create a new project" button then search for 'Analysis Services' and Select Analysis Services Multidimensional and Data Mining Project.
Now, enter the "Project Name" and create a new project.
Step 2: Install VS Data Tools
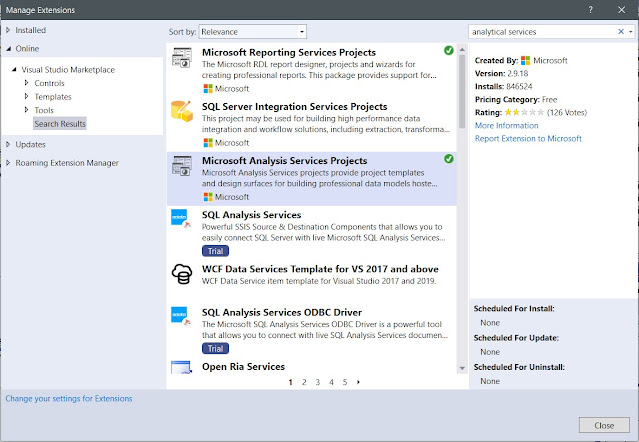
In the Menu bar, select the "Extensions" tab and click "Manage Extensions". Search 'Analytical Services' and install the Microsoft Analysis Services Projects extension.
Step 3: Loading AdventureWorks Database
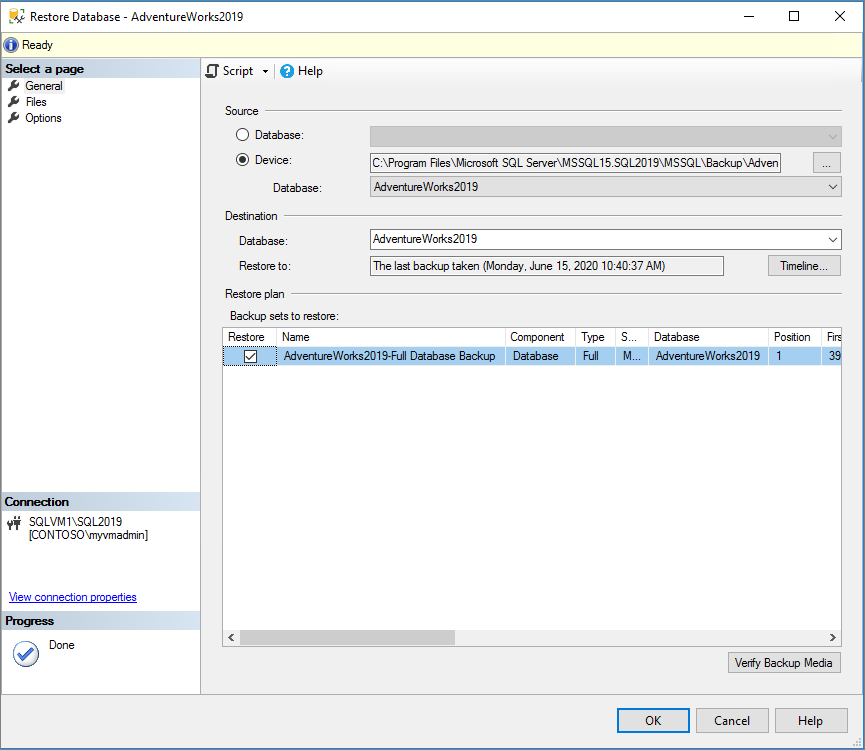
Let's first load our database into our SSMS. To restore your database in SQL Server Management Studio, follow these steps:
3a. Download the appropriate .bak file and move the .bak file to your SQL Server backup location. This varies depending on your installation location, instance name, and version of SQL Server. For example, the default location for a default instance of SQL Server 2019 is:
C:\Program Files\Microsoft SQL Server\MSSQL15.MSSQLSERVER\MSSQL\Backup.
3b. Open SQL Server Management Studio (SSMS) and connect to your SQL Server.
3c. Right-click Databases in Object Explorer > Restore Database... to launch the Restore Database wizard.
3d. Select Device and then select the ellipses (...) to choose a device.
3e. Select Add and then choose the .bak file you recently moved to the backup location. If you moved your file to this location but you're not able to see it in the wizard, this typically indicates a permissions issue - SQL Server or the user signed into SQL Server does not have permission to this file in this folder.
3f. Select OK to confirm your database backup selection and close the Select backup devices window.
3g. Check the Files tab to confirm the Restore as location and file names match your intended location and file names in the Restore Database wizard.
3h. Select OK to restore your database.
Step 4: Add Data Source
In the Solution Explorer, right-click Data Sources and select New Data Source:
Select the option to create a new Data Source based on an existing or new connection and press the new button:
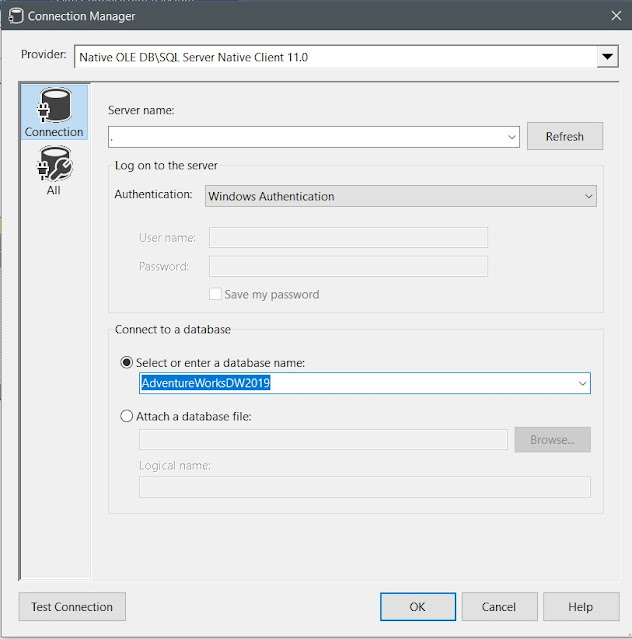
In the Provider option, select Native OLE DB\SQL Server Native Client 11.0. For the Server name, select the SQL Server with the AdventureworksDW database:
In Impersonation information, you can select the "Inherit" option.
In the Completing the wizard, press the Finish button.
Step 5: Add Data Source Views
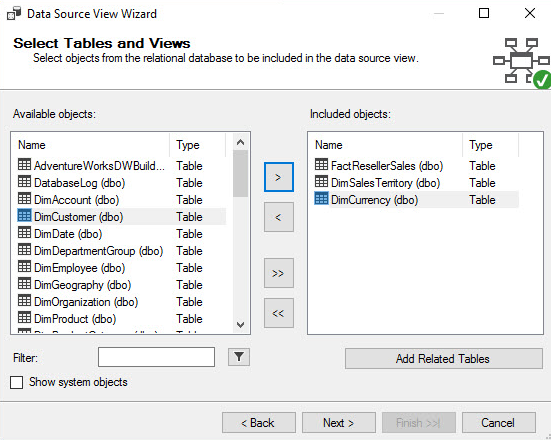
In the solution explorer, select New Data Source View and choose the data source you just created then after clicking the Next Button. Select the table FactResellerSales, DimSalesTerritory, and DimCurrency tables. Press Finish to successfully create Data Source View.
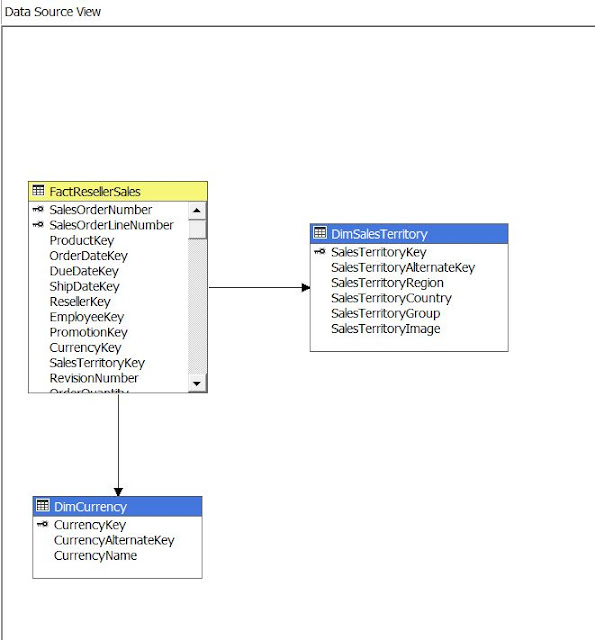
As you can see below, the yellow box shows the Fact Table having Measures and the blue box shows the Dimensions tables having Dimensions.
Step 6: Create Dimensions
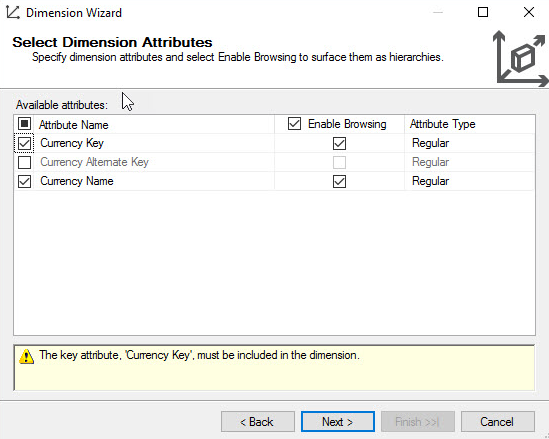
To create a cube, we will add dimensions to the cube. In the Solution Explorer, right-click Dimensions and select New Dimension. Select the option Use an existing table. Select DimCurrency as the main table. By default, the key column is the currency key. In available attributes, select currency name:
Click the "Finish" button to create the dimension. Drag and drop the Currency Name from the attributes pane to Hierarchy.
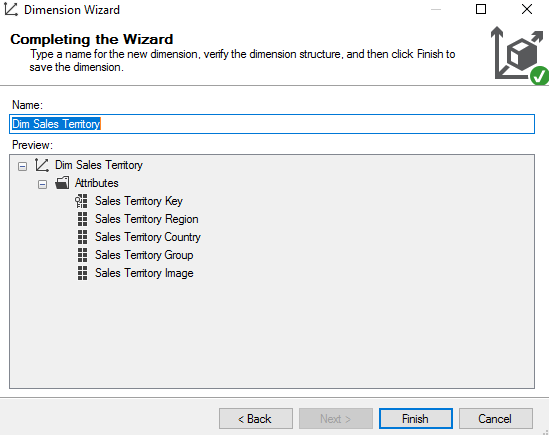
Once you have created the first dimension, you can repeat step 5 to create the sales territory dimension. Here is the second dimension image:
In both the dimensions created, click the process icon to process the dimension. The process will generate the structure and load data to the dimension from the SQL Server table.
Press run to process the dimension, then in the Process Progress, close the process once the process is successful.
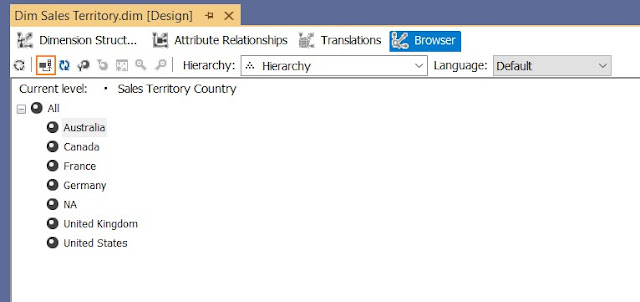
After you have completed this process work for both dimensions, you can verify in the "Browser" tab.
During the process progress, I faced an error "OLE DB error: OLE DB or ODBC error: Login failed for user 'NT Service\MSSQLServerOLAPService'", now to solve this issue, you have to follow these steps:
- Open up SQL Server Management Studio and connect to Database Engine
- Go to Security
- Right-click on Login
- New Login > Add user: "NT Service\MSSQLServerOLAPService"
- Select the AdventureWorks Database
- User Mapping [click on the database in the list]
- In the window database, role membership click on db_datareader
Step 7: Create a Cube
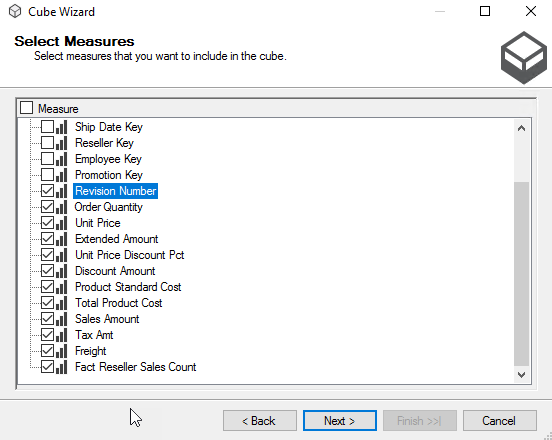
We will now create the cube. In the Solution Explorer, right-click Cubes and select New Cube. In Select Measure Groups Tables select the 'FactResellerSales' table. Measure group tables are used to include the table with data to measure. A measure can be the number of sales, amount sold, freight, etc.
After this, you can select the data to measure. We will uncheck all the keys.
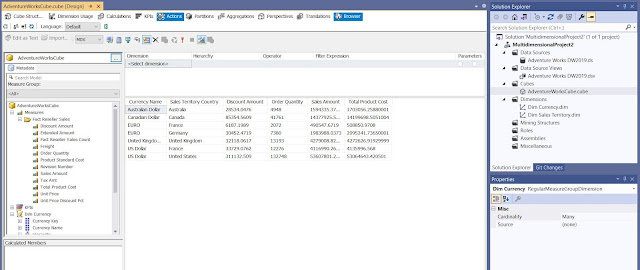
Select the dimensions that you want to add to the cube. Once the cube is created, press the 'Finish' button. You can process the cube and then refresh it from the Browser tab.
You can now drag and drop the measures. Finally, your cube is ready to use.
Conclusion
Here are the complete steps I performed to get my SSAS Cube ready, faced an error, that I have also discussed and solved. I hope that this article helps you in achieving the perfect cube.
Keep supporting and stay happy!












No comments:
Post a Comment
Thank you for submitting your comment! We appreciate your feedback and will review it as soon as possible. Please note that all comments are moderated and may take some time to appear on the site. We ask that you please keep your comments respectful and refrain from using offensive language or making personal attacks. Thank you for contributing to the conversation!